This is the first of several installments that take you through the steps of making a magic carpet bag out of an old textile. The ingredients list below assumes you are using a textile but the same steps are applicable to a wide range of other fabrics and materials. Your ingredients list will change with your chosen bag material.
Old textile
Muslin (for interlining)
Buckram (for reinforcement / structure)
Lining material
Thick sewing thread – buttonhole twist or quilting thread
Chenille Needle
Safety pins
Zipper with double sliders
JUL Forager 16 inch screw-in leather handles – 1 pair
JUL 36 inch sling handle with screw-in tabs – 1 handle
6-8 half round bag feet in nickel
Dimensions – Cutting the Material
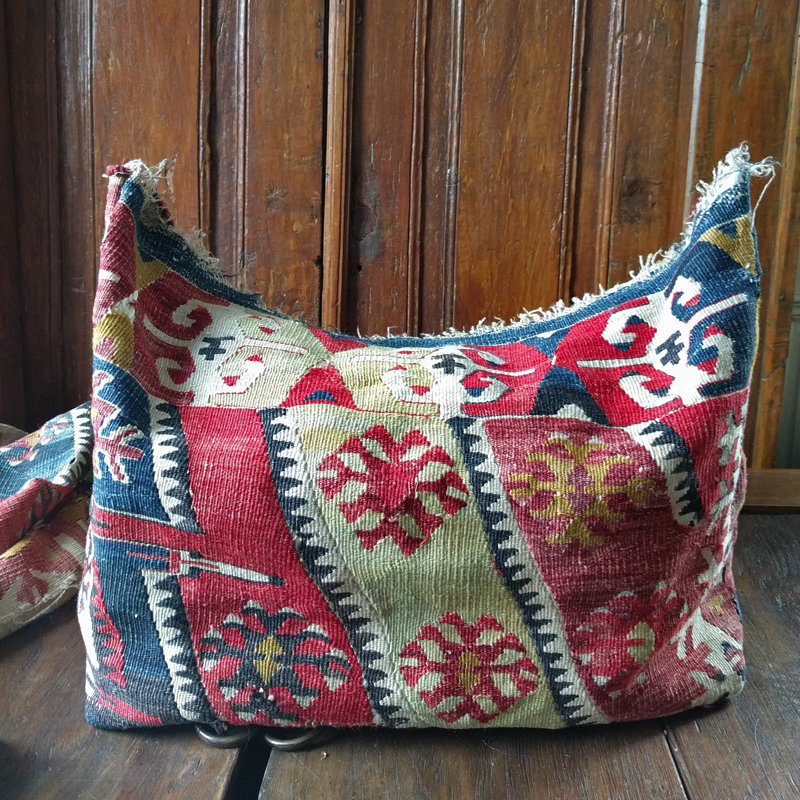
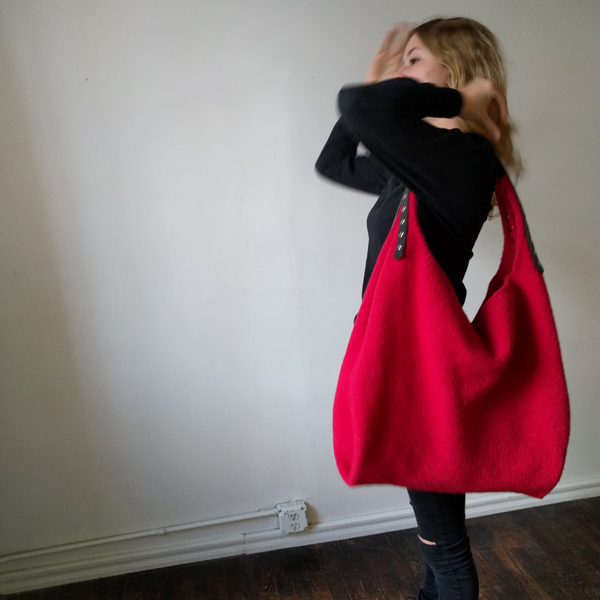
The finished dimensions and cutting instructions offered here are for the pictured bag. I started with the native width of the material as I don’t like to cut hand-woven fabrics any more than I have to. The only cut I made was to establish the length of the material, which in turn determined the height of the bag and the depth of the bag bottom.
Carpet Bag fabric: 32 inches wide x 44 inches long. Interlining fabric should be cut to the same dimensions as it will be sewn together with the bag body fabric.
Finished dimensions for my structured Magic Carpet bag will be approximately 29 inches wide at the bag opening, 18 inches high and 8 inches deep. Finished dimensions for an unstructured bag will be 29 inches wide at the bag opening, 22 inches high on each bag face and 18 inches high at the side seam with an 8-inch wide perpendicular bag bottom.

Making the Bag Body
Please Note: If you are using an alternative material and want to machine-stitch an interlining fabric to your bag fabric, you will need to do that step prior to sewing up the bag. If you are hand-stitching your interlining to an antique textile, you will want to sew up the bag first.
Fold the material in half widthwise together with your interlining fabric and put right sides together with the fold at the bottom (the interlining will be visible on the outside as you sew up the bag but will move to the inside of the bag when you turn the bag right side out). The textile edges parallel to the fold will be the bag opening and will not be sewn together. The other textile edges, perpendicular to the fold on the right and left sides, will become the sides of the bag. Leave a generous seam allowance (1 – 1.5 inches) and sew up the two sides.
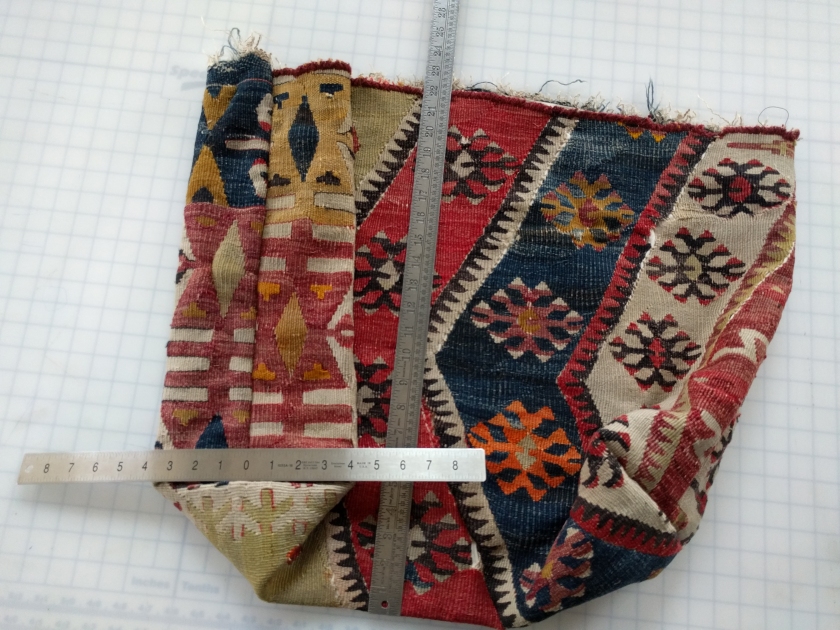
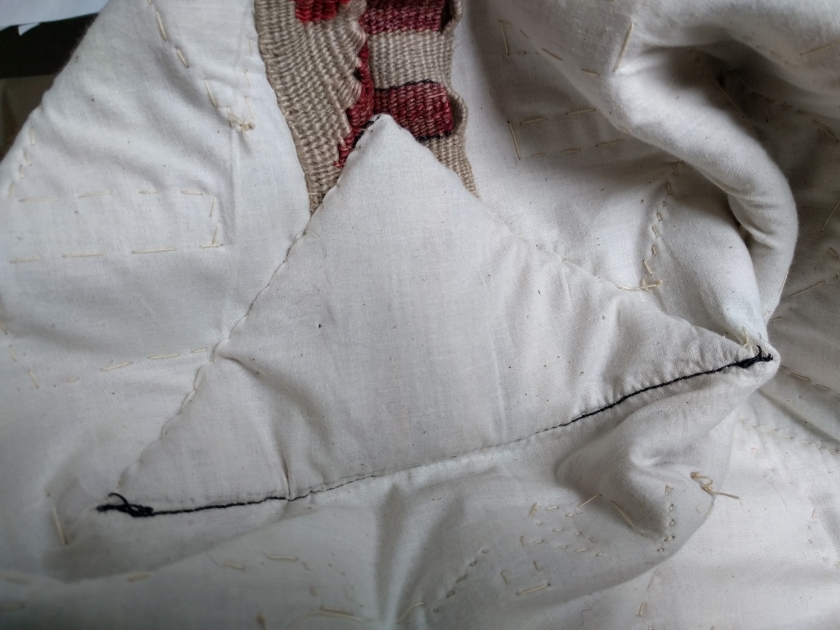
To create the bag bottom, after sewing up the sides (working on the wrong side), open the bag up, putting the side seam face up and centered. Create a triangular point at the tip of each side seam as in the photograph. Find where the width of the ‘base’ of your triangle measures 8 inches (or another width if you are doing custom dimensions) and mark a line perpendicular to the side seam. Sew at your mark. If you are using an antique textile, I suggest you not cut the triangular excess off as you may wish to preserve the possibility of taking the bag apart at a later time. Makers using other materials will likely choose to cut off the triangle of excess. Make sure to tack and finish your stitching lines so they remain stable.
Turn your bag body right side out.
Interlining
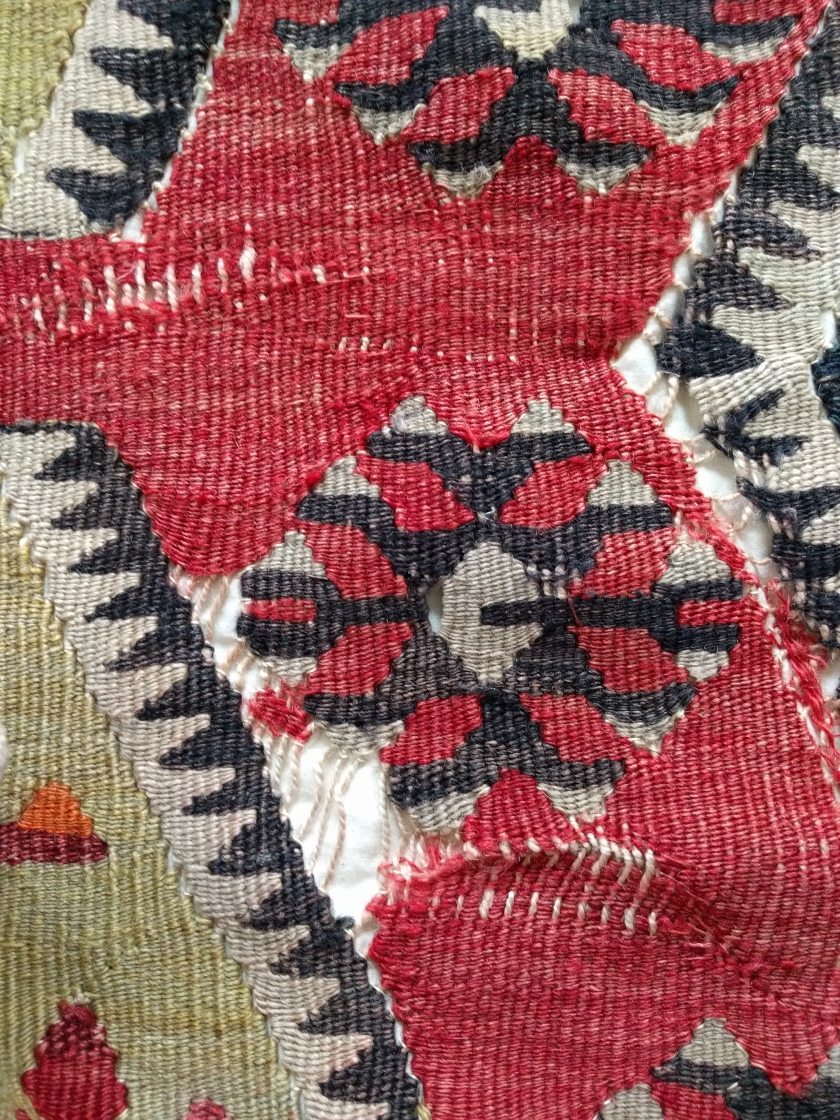
The textile I am using is very heavy and floppy and has damaged areas. Without reinforcement and strengthening, these areas of damage would continue to deteriorate. By wedding an interlining to my textile, I create a stable fabric as much of the stress of use will be on the interlining, not on the textile itself. You can see where I have hand-stitched along the textile’s woven patterns. With each stitch I have wrapped my sewing thread around a single warp thread. When my sewing thread is pulled snug, it disappears amidst the weft threads of the textile.
I wanted my stitches to be invisible, but if you are interested in creating a secondary pattern of stitching lines, you can do a running stitch on top of the textile either by hand or by machine like that used in quilting. Please note: Machine stitching should be done prior to sewing up the bag body.
The relationship of outside and inside material changed when you created the bag body. That is, the inside material now has to be slightly smaller and curve to accommodate the shape of the textile that forms the exterior. The following technique persuades the two materials to behave as one as you are working to stitch them together. Working on the right side of the material (interlining on the inside) and starting from the center of the bag bottom, start to pin the textile and the interlining together using safety pins. Working up each side, place your safety pins equi-distant every 6-8 inches until you have pinned the entire bag body.

You may develop a different technique for doing the stitching to connect the textile to the interlining. This is how I do it. With the bag right side out, I put my left hand inside the bag and work on top of the textile. I pass my needle over a warp thread, down under the interlining material, back up on the other side of the warp thread, repeat. In sum, I catch the warp threads in between where the colors meet in the tapestry weaving process, which is similar to intarsia knitting.
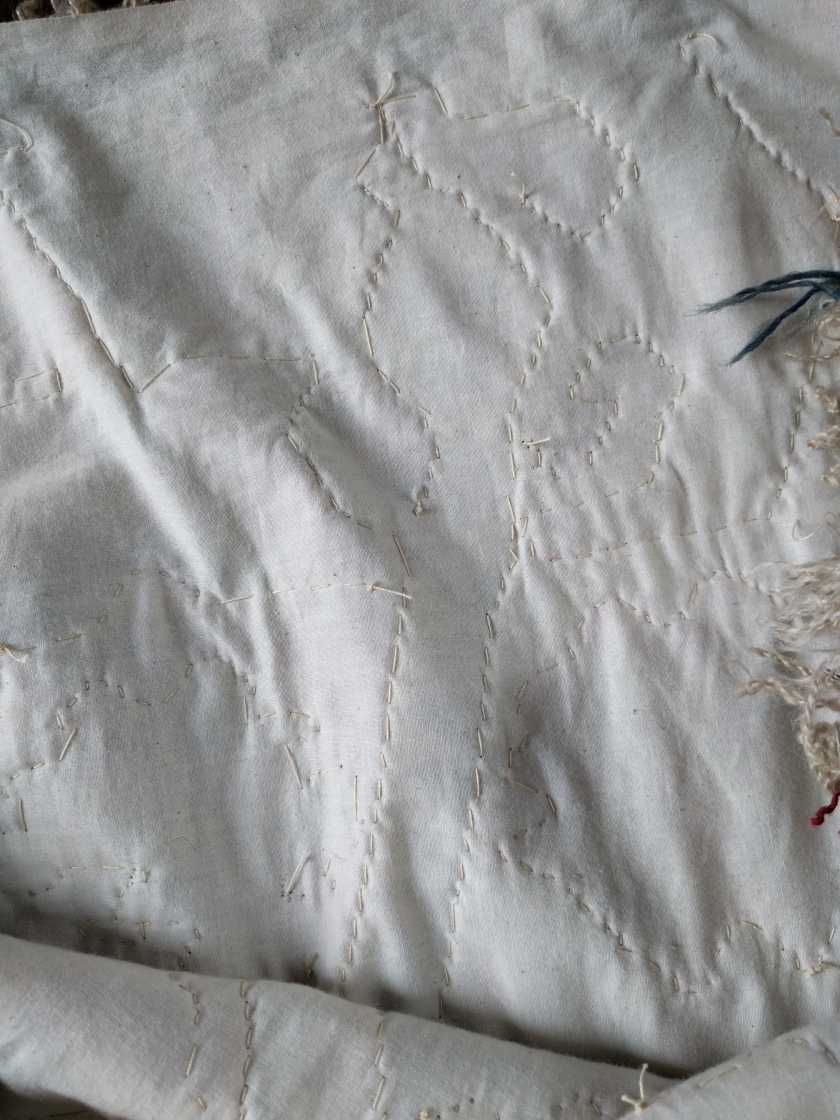
You can see this process in action in my Instagram post of August 8: @jul_designs. In the stitching on the interlining, therefore, you can see the shapes of the ornaments. In the image below you can see that this results in a virtually invisible stabilization.
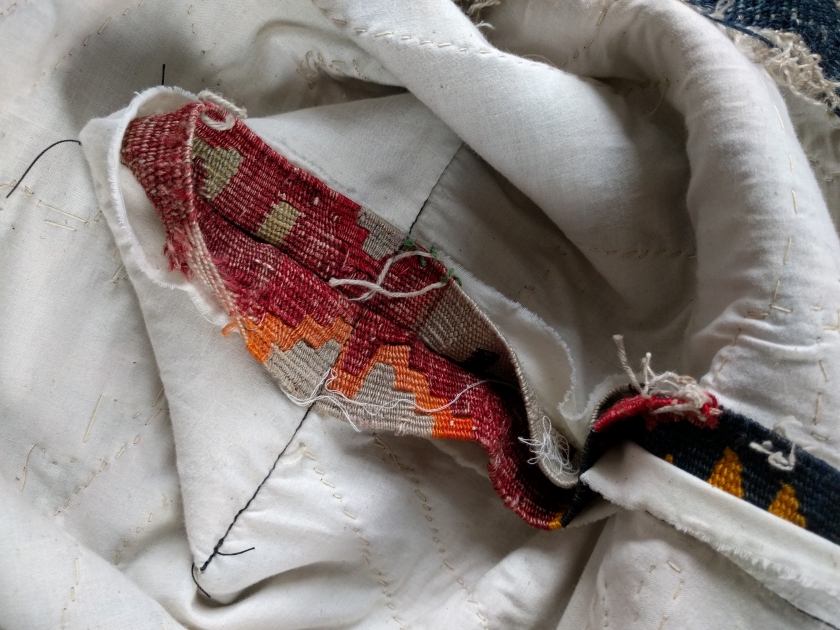
Once the entire bag has been stabilized in this manner, the interlining fabric is tucked under the textile at the side seams and the edges of the textile are tacked down.

Then the triangle of excess material at the base of the side seam on both sides is also tacked down neatly, creating a crisp shape at the sides of the bag bottom.
At this point, your textile material has been fully integrated with your interlining and you are ready to move on to the next steps of structuring, adding closures or a zipper, lining and bagfeet, and adding handles, all of which I will address in the next several Magic Carpet posts. In the meantime, if you are starting to work on your own Magic Carpet Bag, you will have time to get these steps completed before the next instructional post.
FOR FULLED AND FELTED BAGS:
The sewing instructions above offer some interesting creative possibilities for you to try new things with your fulled and felted pieces. Stitching together your exterior fabric with an interlining becomes a way to add surface interest and texture, especially if you make your stitches visible and/or use them to create an intaglio or light-relief effect.
Just a few fulled bag patterns that represent fantastic canvases for the handle and finishing techniques we will be getting to in the coming posts are as follows:
Noni – Metropolitan Bag
Noni – Harmony Bag
Noni – Adventure Bag
Noni – Bedouin Bag
Noni – A Week in Venice Satchel
Debbie Bliss – Felted Bag
Lucia Tedesco – Knitting Basket
Marilyn King – Fulled Afghan Carpet Bag
Like this post? Pin it!

