Embracing Failure: the Magic Carpet Bag’s Challenge to Think Creatively

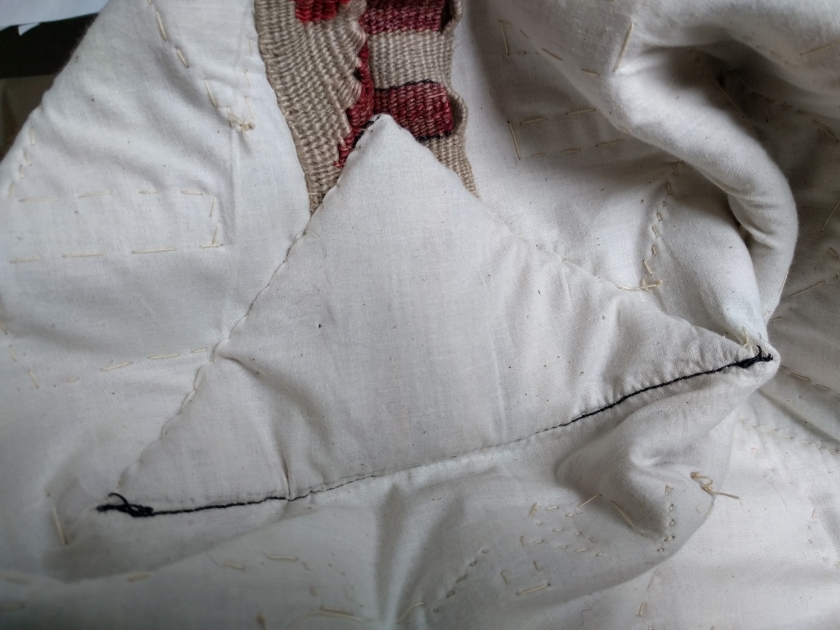
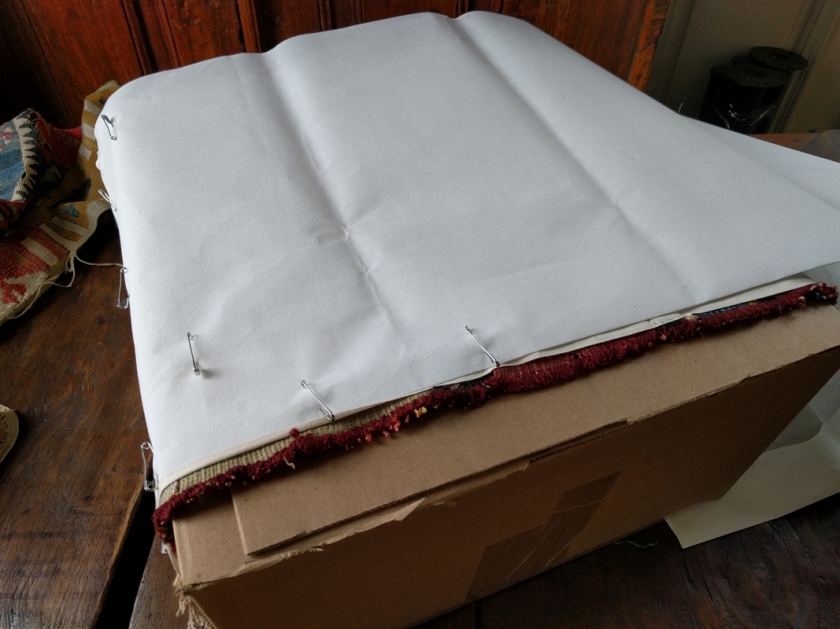
I have been confronted by a problem that has stymied me and delayed the next installment in the Magic Carpet Bag tutorial as I have been trying to figure out what to do. I finished stabilizing the textile with the muslin interlining. Following that process I stitched buckram into the bag to give it body and stiffness.

cutting the buckram to size
Cutting the buckram to size for the bag body

When I first started, it looked like it would work brilliantly. I had pinned the buckram to the inside of the bag with safety pins, same as the muslin.

Image 2 - putting the bag over a box and pinning the buckram to the bag body
Placing the carpet bag body, inside out, on a box and then safety pinning the entire layer of buckram to the bag body (excepting the bag bottom).
image 3 - pinng
Pinning on the box ensured that I connected the buckram to the bag body with twisting or distortion.

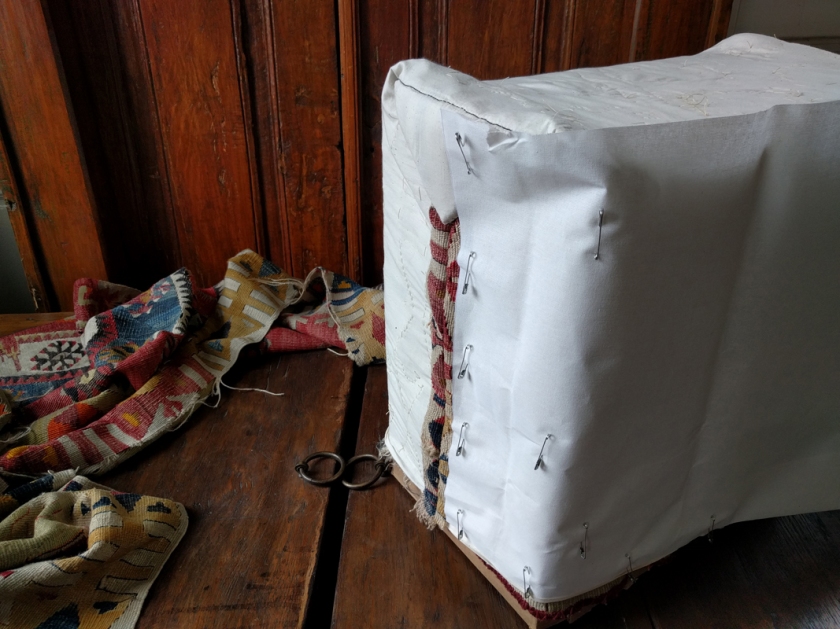
The bag stood up on its own. Fabulous! This was the precise behavior I was going for. I then attached the buckram to the textile with long basting stitches so that the buckram and the textile would act as one piece of material in the same manner as the muslin.

image 4 - securing the edges at the side seam
Basting stitches at the side seam to secure the edge of the buckram.


image 6 - catching 1 weft thread on the outside so the basting stictches are invisible on the exterior
The basting stitches are long on the interior of the bag and catch only 1 weft thread on the front of the bag so they are invisible.
zig zag baste
Basting in a zig zag covers more ground with one row of stitches.

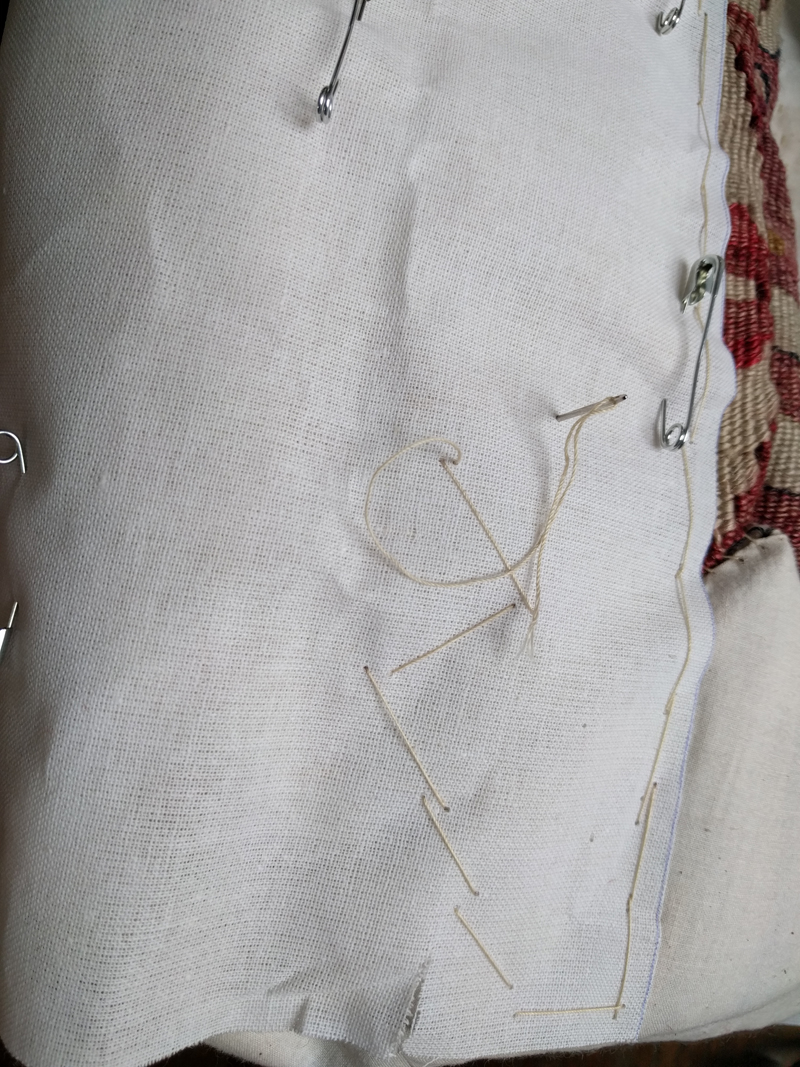
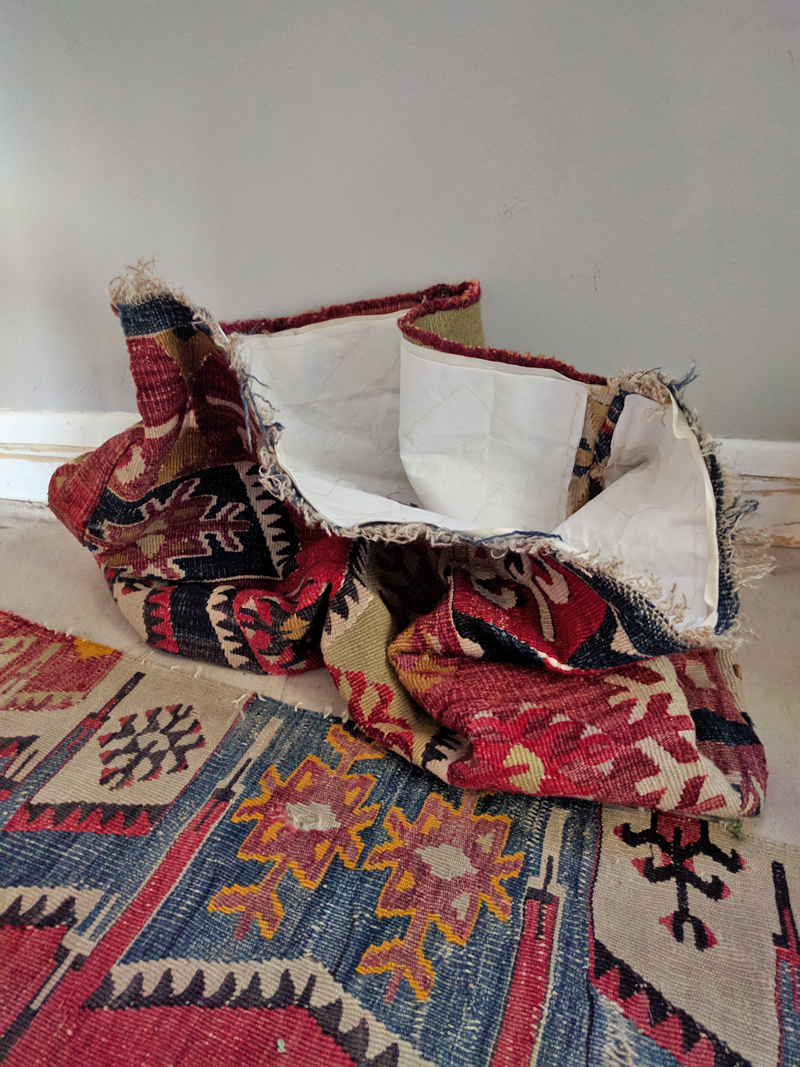
As I worked on the bag in this way I found that the buckram softened up and became more supple. When I finished, the bag no longer stood up on its own. It just slumped.

slump 1
The Magic Carpet Slump

I have been trying to figure out what to do about the bag’s slumping ever since inserting the buckram in order to write the next steps in the tutorial. Then a serendipitous conversation happened and a colleague to whom I was describing this dilemma asked – why not share the challenge you have encountered?

It had not occurred to me to narrate the problem. I am working through this tutorial on the hoof. You are getting my process almost in real time, and that process includes this disruption in my expectations for how the Carpet Bag would work. This disruption has raised a whole series of questions for me. My first response was to think about the bag’s behavior as my failure: my approach to stiffening didn’t work. I obviously used the wrong material. What do I do now? Because I didn’t have ready answers, the Carpet Bag has languished in a soft slump.

But I can tell myself a different story about the Carpet Bag and ask different questions. When the young people I work with in my studio encounter a new task demanding new skills, they have the tendency to say – “I’m no good at that. I always mess things up.” I have forbidden this script in my studio and substituted an alternative script. Instead of “I’m no good at that.” I have instructed them to say “Wow, that is a technique I have never done before. Instead of “I’m no good at that.” I have offered the alternative script “I’m looking forward to building that skill.” They won’t actually say it despite my coaxing. They’re too cool for that. But I have seen a change in attitude that I think indicates they have internalized the message that never having done something before does not constitute bad skill. It just indicates no skill yet. It indicates an exciting journey not yet begun.

I now realized that, in response to my Magic Carpet Bag’s very unmagical slumping, I have been guilty of the “I’m no good at that” mindset I have tried to exorcise from my young students’ thinking. Instead, I am now choosing to see the Carpet Bag’s slump as an opportunity to think more expansively about what I expect from this bag and to respond to its characteristics in creative ways. Rather than view the bag’s behavior as my failure, I can view the bag’s behavior as an invitation to find success in an unanticipated guise. What am I going to do now? This becomes not a defeating question but an exciting one. How do I approach this design opportunity? What are my options? Which of them will I pursue?

slump 3

As I have begun to change my thinking, I realize that the potential next steps I have rolled around in my mind as I have looked at the Magic Carpet Slump on a daily basis are all still assuming that I am grappling with the bag’s bad behavior which I have viewed as representing my failure. In this view, slumping is bad; I need to rectify the slump with a better stiffener approach – plastic mesh, another type of synthetic, non-woven stiffener, a stiff haircell leather lining, a stiff canvas lining, boning at the side seams, cardboard in the bag bottom, etc.

But what if I decide slumping is not bad? What if I decide that a soft bag is an excellent bag? What if I surrender to the characteristics of this particular textile, which is not stiff but rather heavy with beautiful drape. Upon reflection, I suspect stiffness in this bag would elude me without extreme interventions. It would get heavier and heavier as I added material to combat its resistance. It could easily become a Sisyphusean task that no one wants to live through by way of a tutorial, and I wouldn’t want to be the one to try to execute tasks the bag wouldn’t cooperate with. I don’t want to set myself up to give up. Our projects have to match us, our temperaments, our styles of learning and work.  A Sisyphusean Magic Slump does not match me.

slump 4
The buckram, which is visible inside the bag, has given it more body and strength, but no stiffness.

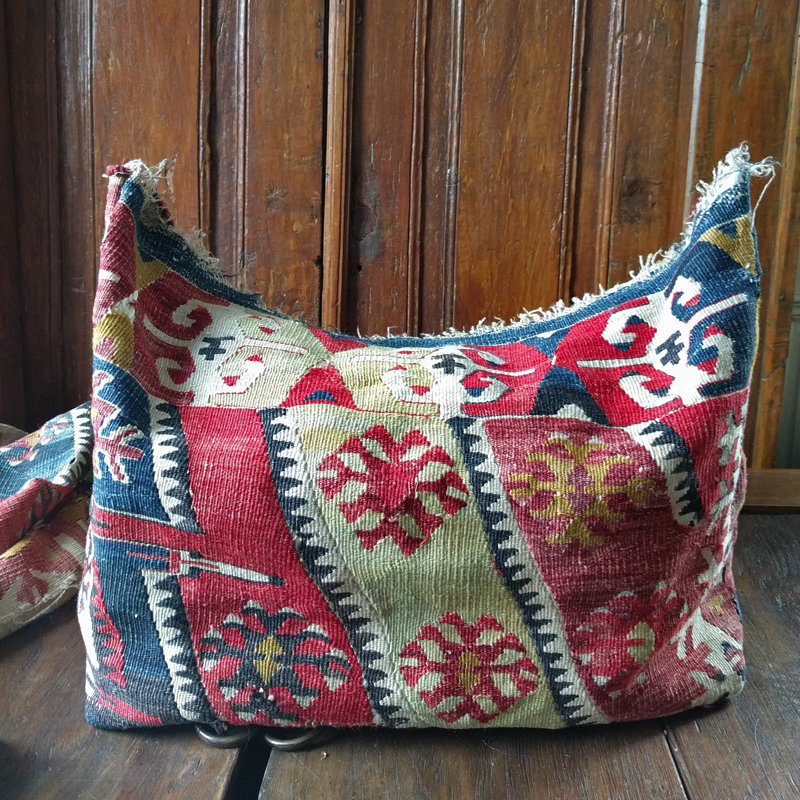
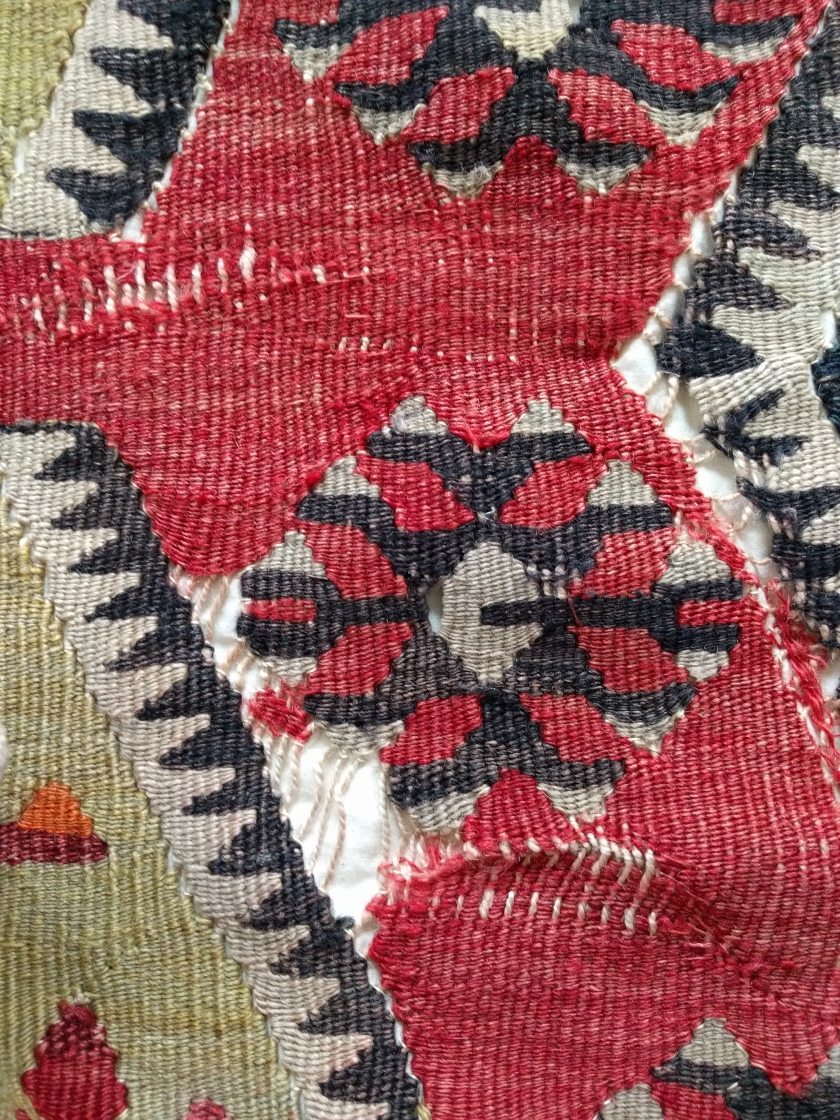
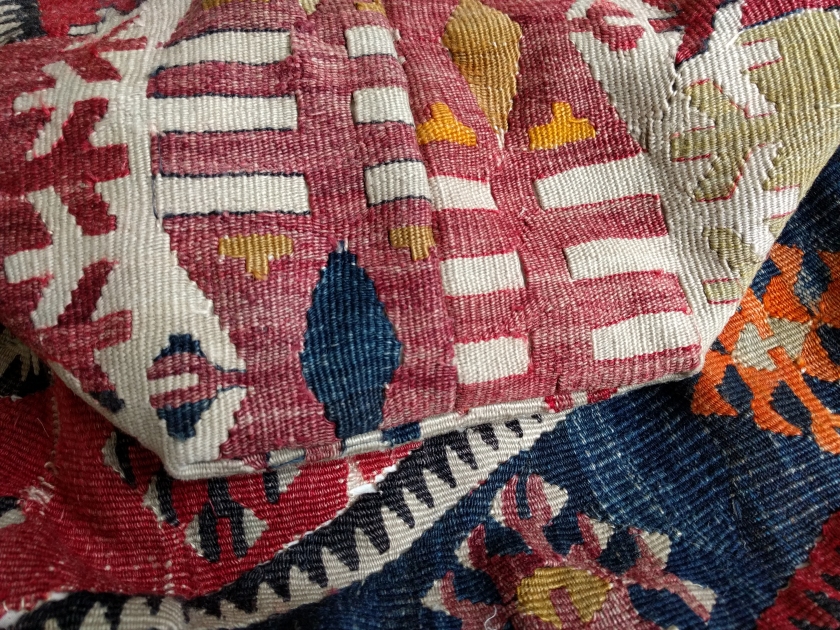
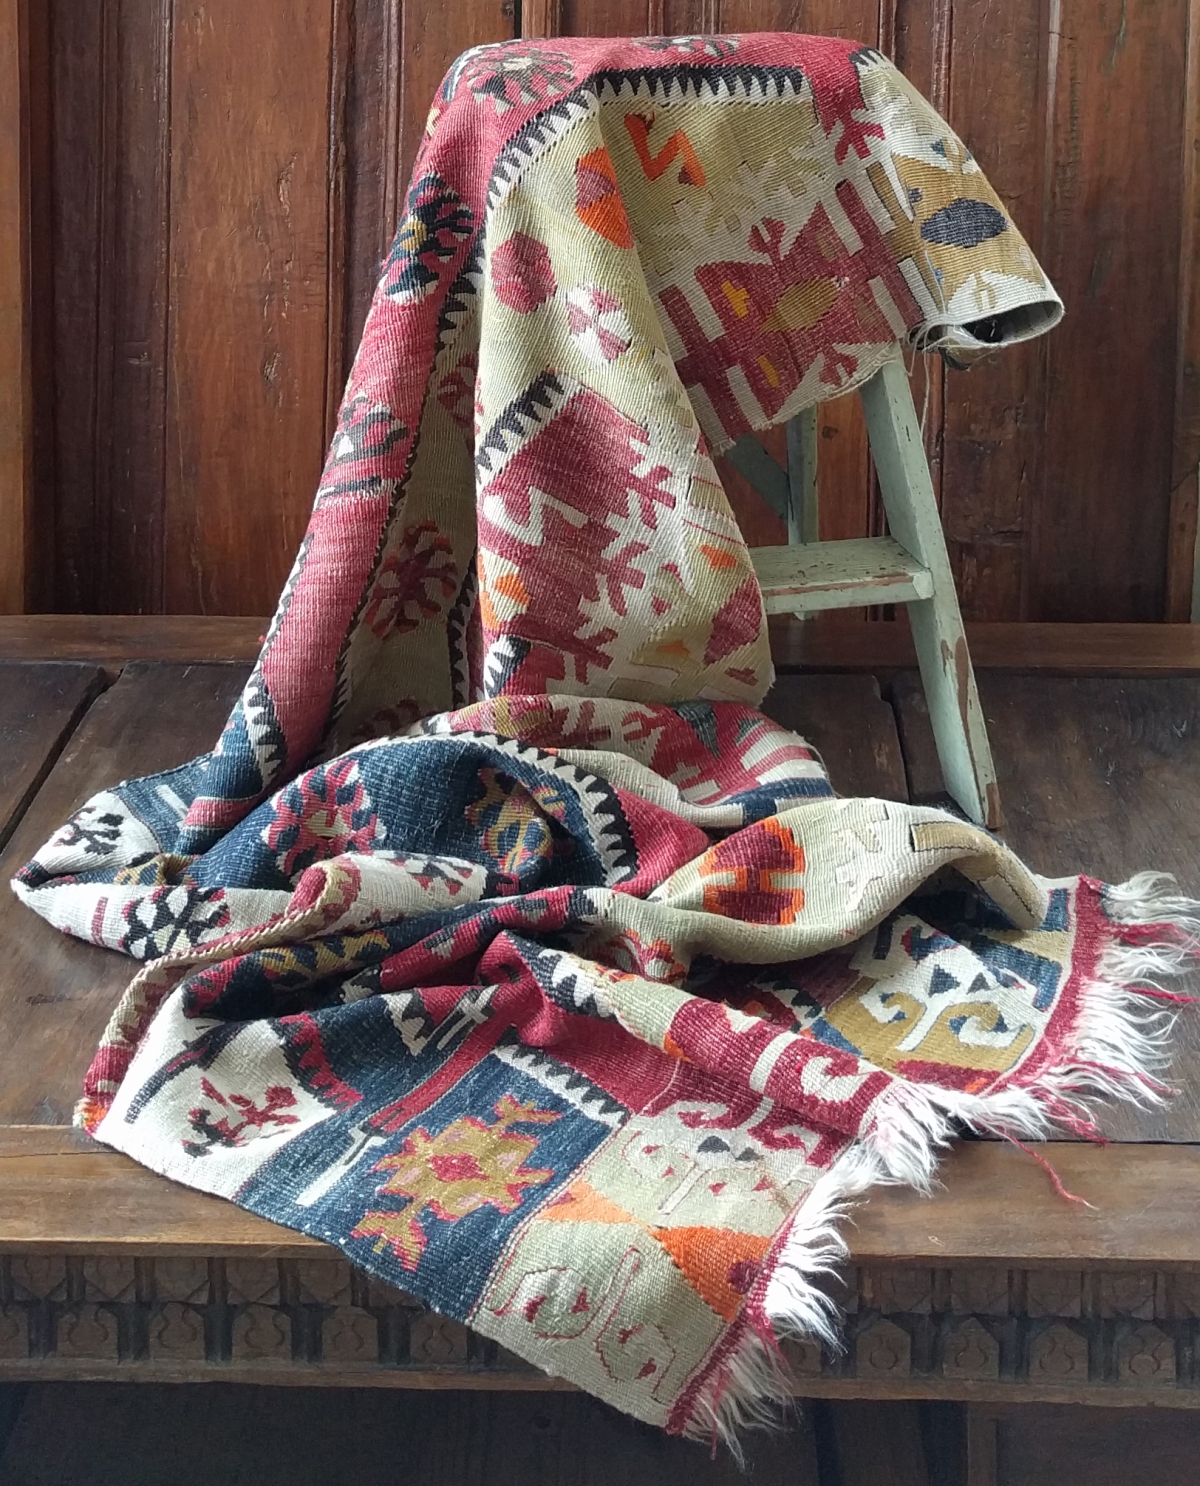
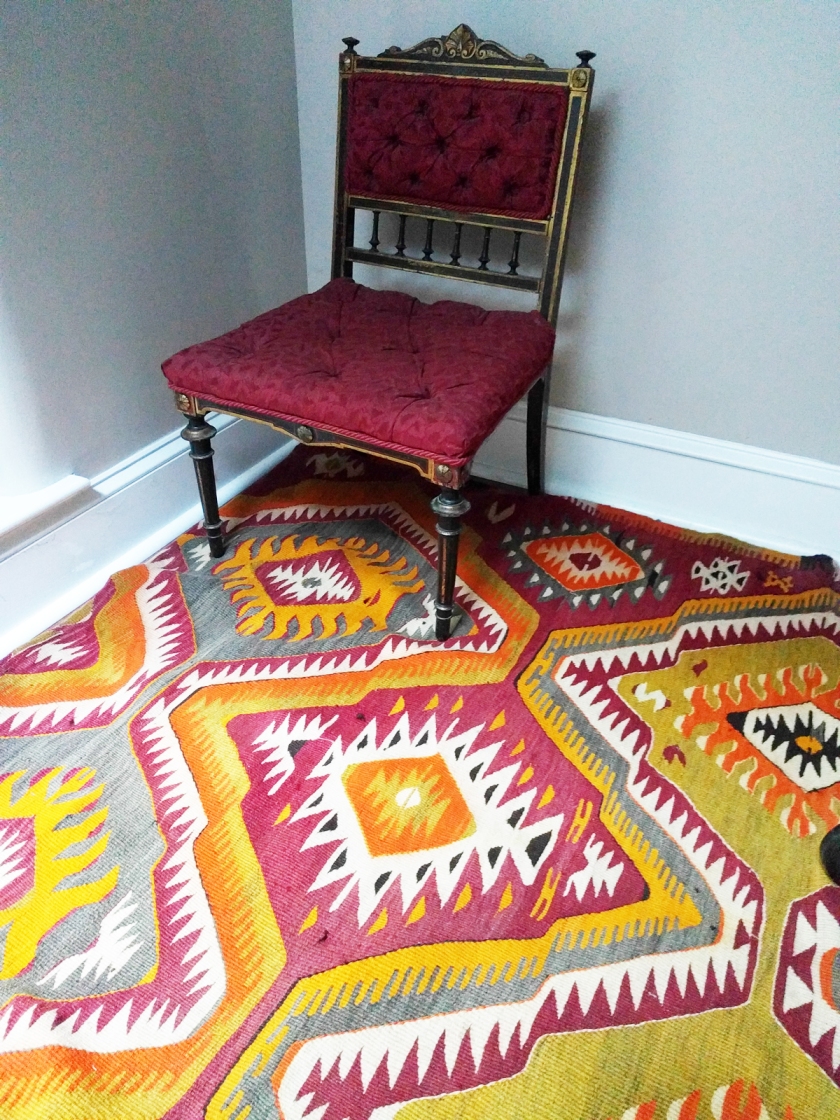
I began my Magic Carpet Bag project loving the social story of household use we can discern and imagine in the textile’s damage, celebrating its handmade-ness, preserving it. I carefully married the weaving to its interlining weft thread by weft thread. Adding the buckram gave it more body and strength, but not the stiffness I sought, and there my acceptance and excitement faltered.

If I choose to accept the Slump’s slump and to see its heavy drape, like it’s damage, as its beauty rather than its deficit, the next step in this tutorial is a combination of two things – discernment and order of operations. I’ll save order of operations for the next tutorial and just tackle discernment here. What I mean by discernment is charting the next steps in alignment with the project’s acknowledged characteristics. What does it want to be and do, and how do I work with that as I make the next series of necessary choices – lining material, closure type, handle treatment? Given what the bag wants to be and do, what is my range of options for making it mine?

Each of you, whether you are working with a handmade textile, a felted or fulled bag body, or some other found or handmade fabric out of which you have begun your Magic Carpet Bag, will need to recognize how your bag is behaving and figure out what materials and processes will work with that behavior. If you have a stiff fabric, you won’t necessarily need or want a stiff material for a lining but you may.  Figure it out using visualization – imagining the bag in use, on your body, in your space – and simulation – by pinning different lining fabrics into your bag body and observing how the materials behave together and whether that behavior supports your vision. If you have a soft fabric, a stiffer lining will give it a bit more body and strength while a soft lining will retain the sensuality and hand-feel of the bag body. If your material is heavy like mine, stiffening may prove more trouble than it’s worth. If your material has alot of drape, that you really love, then choose a lining with drape rather than body so the drape of the finished bag retains the characteristics you enjoy so much.

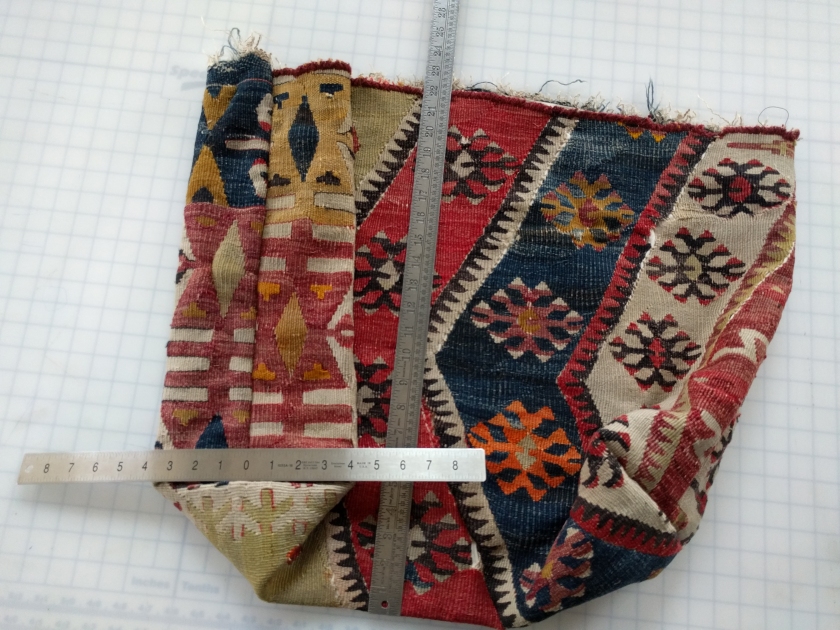
As for my Magic Carpet Bag, I’m going to take another stab at stiffener but reserve it for the bag bottom, the most vulnerable part of the textile. The buckram I put into the bag body I have not yet extended to the bag bottom.  I plan to try 2 or 3 layers.  I don’t expect this to give it stiffness, but rather a bit of shape and greater strength.  I have also decided to try out a lining of some tightly woven, thick, unbleached canvas I have in the studio. It’s not stiff but it’s also not soft. It’s somewhere in the middle. It will not make the bag stand up. The bag will still slump. But it will be strong enough to withstand puncture by pencils or knitting needles and will not herniate in the existing areas of damage when the bag is full.

buckram on the sides only
You can see that the buckram I put on the bag was only wide enough for the sides of the bag. The bag bottom still needs help.

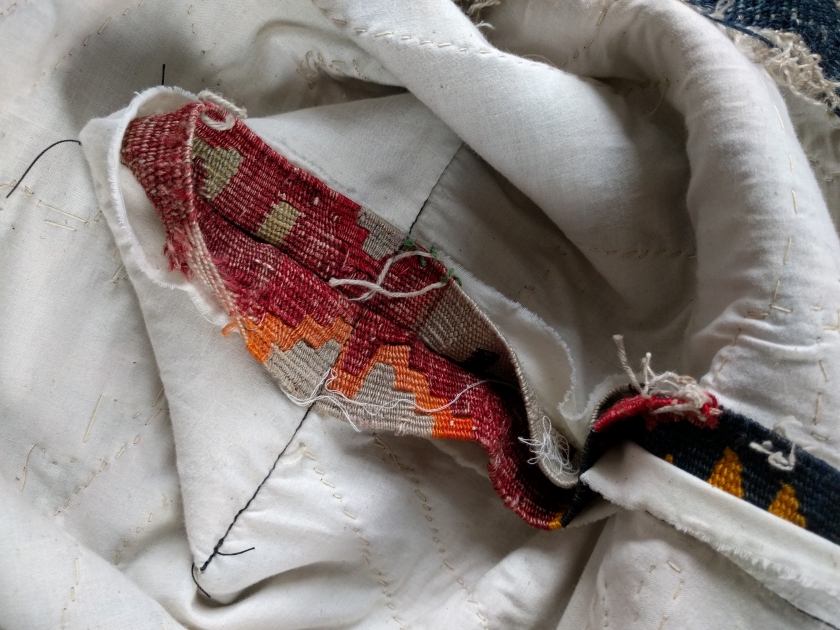
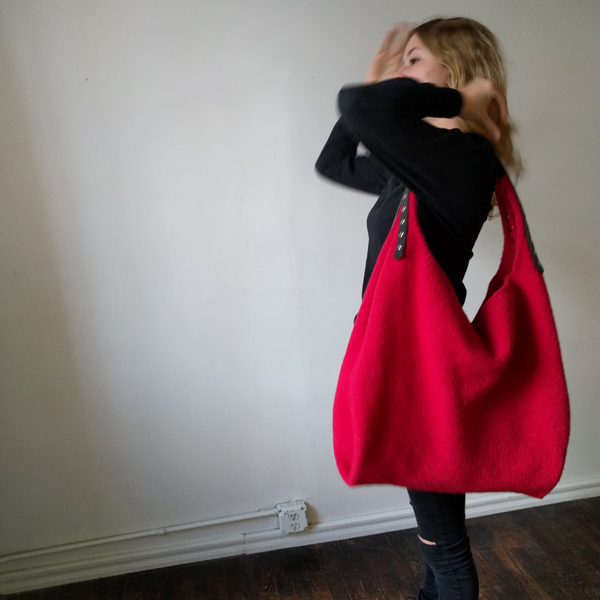
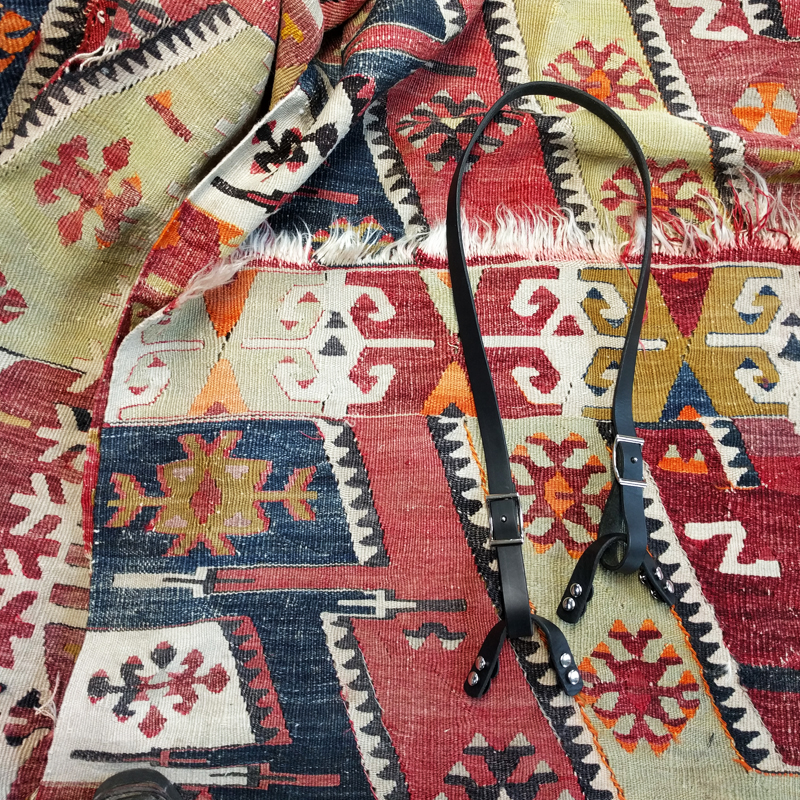
What else do I already know? I will use a zipper as a closure and I plan on using two 16 inch Forager flat strap handles in the middle of the bag, one on each side of the bag opening.  And I will use a Sling flat strap handle with tabs at the two ends of the bag.

sling handle with tabs
Here is the Sling Handle with Tabs that I want to put on the two ends of the bag at the side seams.  Because the tabs straddle the side seam, I can achieve a centered handle.

In what order will I do these steps?

Next post – order of operations.

Like this post? Pin it!

Embracing Failure: The Magic Carpet Bag's Challenge to Think Creatively - hand sewing a bag inspired by a kilim rug on the JUL Designs blog

Hunting Inspiration for New Designs in Andalusia, Spain: Traveling With My Son on the Eve of Becoming an Empty-nester

I was in southern Spain with my son Julian for 10 days, starting on the 16th of August.  My son is now 20 and I have just delivered him to the California College of the Arts.  We got off the plane from Spain on the evening of the 26th and got back on a plane for California early on the 27th. With the help of a friend living in California, I moved Julian into his housing that afternoon and now I am an empty-nester.  As a single mother for the entirety of his life, this represents a significant adjustment. I have no idea yet what the texture of that adjustment will be like. As a result of the timing, this trip with Julian to Spain has taken on a significance I am sure you can empathize with, even if you are not facing or have not faced this particular life-change.

Julian photographing Alcazar

Image above: Julian photographing the ornamentation on a door in Alcazar in Seville, Spain.

The purpose of the trip was originally just business – to hunt inspiration for new JUL designs, both knitwear jewelry and accessories as well as the new line of body jewelry I am now developing.  I had to change the dates of the trip from April to August in order to participate in 10,000 Small Businesses.  I invited Julian to accompany me as a way to mark his departure from my home and his entry into a new phase of his life.  As Julian is an amazing young designer, (headed off to study Industrial Design), working with him on a new jewelry collection (or collections), based on Moorish architecture and ornamentation in southern Spain, was a perfect collaboration – a project we could work on together, the product(s) of which will be artifacts of this special time.

You will see them in the coming year.

Here are some examples of the shapes and motifs we encountered and which will be our inspiration and source material as we develop designs together.

Mezquita small file arches upon arches small file

Image above: Mezquita in Cordoba, Spain.

My son and I became fascinated by the Mezquita in Cordoba for several reasons.  The building is massive, built on a site that had seen other religious structures for centuries. The exterior of the building is simple, high stone walls with massive reinforced doors.  It looks like a fortification. The interior is astonishing.  The columns and arches you see above just seem to recede to the horizon, creating a sense of magnificent, awe-inspiring infinity.

The columns that you see, which at first appear uniform, are varied in material and form, the cornices sometimes corinthian, based on the curving, elegant lobed leaves of the Acanthus plant. But some of the cornices are much simpler, depicting very different carvings and motifs. This variation impressed upon us the history of cultural and religious transformations that happened on this spot, and the ancient salvaging and repurposing that happened each time there was a change.  Why not use what was already there to create your own very different statement about the shape of the cosmos and the relationship between humans and the divine?

Mezquita churchy dome

Image above: Mezquita in Cordoba, Spain.

Much of the ceiling in the Mosque were flat, carved and painted wood.  By contrast, some parts of the ceiling opened up into astonishing and exquisitely ornate domes upon domes that are breath-taking. This combination of arches with areas of flat and carved and painted wooden panels making up the ceiling was dramatic and fascinating.

Mezquita with gold details small file

Image above: Mezquita in Cordoba, Spain.

The repurposing and transformation in ideas about the universe is so gloriously represented in the combination of Islamic and Christian shapes and designs in the Mezquita’s interior.  How surprising and spectacular that inside the Mosque, Catholics built a church!

IMG_20170820_154758

Image above: One of the Christian areas that made up the church within the Mezquita in Cordoba, Spain.

Mezquita carved door detail small file

Image above: Mezquita in Cordoba, Spain.

Here you see carved motifs based on the Acanthus leaf, a form that recurs in Roman, Islamic, and Christian ornament over and over.  The Acanthus plant is one of those plants that has an unusual range of powerful uses for early peoples and so it shows up again and again in recognition of its potency as well as the beauty of its form.

Alcazar big wall and doorways small file

Image above: Alcazar in Seville, Spain.

The Alcazar in Seville is absolutely stunning and was the first of these Moorish buildings that Julian and I visited.  The scale is smaller than the Mezquita as it was a residence.  Its carvings are elaborately painted as they were at the time when the palace was built.  In this way the experience of the space is very different from that of the Palace of the Nazaries in the Alhambra complex in Granada where the carvings are without color.  While the Palace of the Nazaries allows you to see the naked motifs clearly, the Alcazar offers a different kind of impression and visual power – inspiring with the ornamental carving, the exquisite combinations of one color and another, and color in relation to the ornaments it adorns.  I just wept at its beauty and I wept at the fact that I had the precious opportunity to experience such a place with my son.

Alcazar colored doorway small file

Image above: Alcazar in Seville, Spain.

Alcazar doorway detail small file

Image above: Alcazar in Seville, Spain.

The gorgeousness of these spaces is amazing and becomes even more so when you abstract the ornament using frames – as in a camera or cellphone – that isolate particular relationships between the ornamentation and architectural form.  What we isolate in the frame is closer to the way we focus our eyes on specific juxtapositions we find fascinating and beautiful. And these juxtapositions are far more complex and varied, and personal, than the vistas in the photo book of the place.

I discovered on this trip how similar my son’s ‘eye’ is to mine. We frequently chose the same juxtapositions to photograph, though one or the other of us might execute it better.

How gratifying is that, to see your values and all of the lessons in being a person and viewing the world through a lens of art and design emerge, distinct and personalized, in your child after 20 years of eldering and asking “where does your eye go?”

Anti-selfie Selfie

Image above: Julian’s and my anti-selfie selfie at Medina Al Zahara, Cordoba, Spain: we are not blocking the view of the monument!

IMG_20170825_122541

Image above: Julian and me at Medina Al Zahara, Cordoba, Spain.  We just can’t seem to produce a conventional selfie no matter how hard we try!  Here Julian caught me rubbing my eyes.  I find it funny that it looks like I am covering my eyes so as not to see something.  So not the case!

And we have not yet gotten to the Alhambra part of the journey . . .

Like this post? Pin it!

Hunting Inspiration for New Designs in Andalusia, Span with JUL Designs


Making Your Magic Carpet Bag . . .

This is the first of several installments that take you through the steps of making a magic carpet bag out of an old textile.  The ingredients list below assumes you are using a textile but the same steps are applicable to a wide range of other fabrics and materials.  Your ingredients list will change with your chosen bag material.

Old textile

Muslin (for interlining)

Buckram (for reinforcement / structure)

Lining material

Thick sewing thread – buttonhole twist or quilting thread

Chenille Needle

Safety pins

Zipper with double sliders

JUL Forager 16 inch screw-in leather handles – 1 pair

JUL 36 inch sling handle with screw-in tabs – 1 handle

6-8 half round bag feet in nickel

Dimensions – Cutting the Material

The finished dimensions and cutting instructions offered here are for the pictured bag.  I started with the native width of the material as I don’t like to cut hand-woven fabrics any more than I have to.  The only cut I made was to establish the length of the material, which in turn determined the height of the bag and the depth of the bag bottom.

Carpet Bag fabric: 32 inches wide x 44 inches long.  Interlining fabric should be cut to the same dimensions as it will be sewn together with the bag body fabric.


Finished dimensions for my structured Magic Carpet bag will be approximately 29 inches wide at the bag opening, 18 inches high and 8 inches deep. Finished dimensions for an unstructured bag will be 29 inches wide at the bag opening, 22 inches high on each bag face and 18 inches high at the side seam with an 8-inch wide perpendicular bag bottom.

IMG_20170810_180718
Width of the bag measured at the bag opening after the bag has been sewn up
IMG_20170810_180629
Height of each bag face – 22 inches – measured from the bag opening to the widthwise fold. Depth of the bag – 8 inches – measured with a centering rule at the perpendicular seam.

Making the Bag Body

Please Note: If you are using an alternative material and want to machine-stitch an interlining fabric to your bag fabric, you will need to do that step prior to sewing up the bag.  If you are hand-stitching your interlining to an antique textile, you will want to sew up the bag first.

Fold the material in half widthwise together with your interlining fabric and put right sides together with the fold at the bottom (the interlining will be visible on the outside as you sew up the bag but will move to the inside of the bag when you turn the bag right side out). The textile edges parallel to the fold will be the bag opening and will not be sewn together.  The other textile edges, perpendicular to the fold on the right and left sides, will become the sides of the bag. Leave a generous seam allowance (1 – 1.5 inches) and sew up the two sides.

To create the bag bottom, after sewing up the sides (working on the wrong side), open the bag up, putting the side seam face up and centered. Create a triangular point at the tip of each side seam as in the photograph.  Find where the width of the ‘base’ of your triangle measures 8 inches (or another width if you are doing custom dimensions) and mark a line perpendicular to the side seam.  Sew at your mark.  If you are using an antique textile, I suggest you not cut the triangular excess off as you may wish to preserve the possibility of taking the bag apart at a later time. Makers using other materials will likely choose to cut off the triangle of excess.  Make sure to tack and finish your stitching lines so they remain stable.

Turn your bag body right side out.

IMG_20170810_180402

Interlining

The textile I am using is very heavy and floppy and has damaged areas.  Without reinforcement and strengthening, these areas of damage would continue to deteriorate. By wedding an interlining to my textile, I create a stable fabric as much of the stress of use will be on the interlining, not on the textile itself. You can see where I have hand-stitched along the textile’s woven patterns.  With each stitch I have wrapped my sewing thread around a single warp thread.  When my sewing thread is pulled snug, it disappears amidst the weft threads of the textile.

I wanted my stitches to be invisible, but if you are interested in creating a secondary pattern of stitching lines, you can do a running stitch on top of the textile either by hand or by machine like that used in quilting.  Please note: Machine stitching should be done prior to sewing up the bag body.

The relationship of outside and inside material changed when you created the bag body. That is, the inside material now has to be slightly smaller and curve to accommodate the shape of the textile that forms the exterior. The following technique persuades the two materials to behave as one as you are working to stitch them together. Working on the right side of the material (interlining on the inside) and starting from the center of the bag bottom, start to pin the textile and the interlining together using safety pins. Working up each side, place your safety pins equi-distant every 6-8 inches until you have pinned the entire bag body.


IMG_20170811_122819
Textile and interlining pinned together with safety pins.

You may develop a different technique for doing the stitching to connect the textile to the interlining.  This is how I do it.  With the bag right side out, I put my left hand inside the bag and work on top of the textile.  I pass my needle over a warp thread, down under the interlining material, back up on the other side of the warp thread, repeat. In sum, I catch the warp threads in between where the colors meet in the tapestry weaving process, which is similar to intarsia knitting.

IMG_20170810_180142
Hand-stitching used to marry the textile to the muslin interlining.

You can see this process in action in my Instagram post of August 8: @jul_designs. In the stitching on the interlining, therefore, you can see the shapes of the ornaments.  In the image below you can see that this results in a virtually invisible stabilization.

IMG_20170810_180812
Area of damage stabilized by invisible stitches connecting the textile to the stabilizing interlining.

Once the entire bag has been stabilized in this manner, the interlining fabric is tucked under the textile at the side seams and the edges of the textile are tacked down.

IMG_20170811_121701

Then the triangle of excess material at the base of the side seam on both sides is also tacked down neatly, creating a crisp shape at the sides of the bag bottom.

IMG_20170811_122204

IMG_20170811_122241

At this point, your textile material has been fully integrated with your interlining and you are ready to move on to the next steps of structuring, adding closures or a zipper, lining and bagfeet, and adding handles, all of which I will address in the next several Magic Carpet posts.  In the meantime, if you are starting to work on your own Magic Carpet Bag, you will have time to get these steps completed before the next instructional post.

FOR FULLED AND FELTED BAGS:

The sewing instructions above offer some interesting creative possibilities for you to try new things with your fulled and felted pieces.  Stitching together your exterior fabric with an interlining becomes a way to add surface interest and texture, especially if you make your stitches visible and/or use them to create an intaglio or light-relief effect.

Just a few fulled bag patterns that represent fantastic canvases for the handle and finishing techniques we will be getting to in the coming posts are as follows:

Noni – Metropolitan Bag

Metro front picture
No matter what scale of bag you are interested in, the Metropolitan Bag pattern gives you options for beautiful foundational shapes that are perfect for experiments in ornamentation.

Noni – Harmony Bag

putting hair up
Noni Harmony Bag becomes a beautiful canvas for exciting finishing with easy-to-attach JUL Screw-in leather handles.

Noni – Adventure Bag

Noni – Bedouin Bag

Noni – A Week in Venice Satchel

Debbie Bliss – Felted Bag

Lucia Tedesco – Knitting Basket

Marilyn King – Fulled Afghan Carpet Bag

Like this post? Pin it!

MagicCarpetBagTutorial.jpg

Making a Magic Carpet (Bag)

I promised on my Instagram (@jul_designs) that I would begin a series of posts with video instructions on how to make a carpet bag. This post is a prelude, the back-story.

Though my example carpet bag will be sewn together, I will be providing resources for those of you who don’t sew and prefer to work in other media – knitted and fulled, felted, crocheted, quilted – who want the easy finishing and style of our JUL screw-in leather handles made right here in the USA in our Studio in Catonsville, Maryland.

In this first post, I want to tell you why my demonstration piece is a flat weave indigenous textile. I think it’s a story worth telling because it lets you know why it’s not a knitted/fulled bag – of which I have made many when I was working with my sister and knitwear designer Noni – and it lets you know why I chose this particular medium even though it entails some special challenges. Why I’m not knitting this bag is a very short story: I have arthritis and can no longer knit. Why I’m sewing the bag out of an antique textile is a longer story:

My most important and prized possession as a kid was a flat weave rug – a kilim. I don’t know where it was made – perhaps Turkey. Below is a picture of the rug in my home today. This is the story of how it came to be mine.

actual kilim

I must have been about 16. I was in the car with my mother and we saw a guy by the side of the road selling rugs. My mother had a kilim and several other oriental rugs that we both loved and so of course we stopped. I picked out the most vibrant and largest of the rugs and my mother bought it as a gift for me. It was only $150 because the guy who sold it to us was watching the rugs for a friend named Angel who hadn’t told him anything about how the rugs should be priced. We knew we were getting something wonderful for virtually nothing. My mother later said we should have bought them all.

Throughout middle school and high school I wanted to be an artist. I drew all the time. One of the things I drew was the rugs.  I drew them over and over.  Some of these drawings are lost. I have no idea what happened to them. But I still have a few, including two etchings I did. This etching is of the kilim rug my mother had (right) and a Swedish blanket (left) that I still have.

first kilim etching

I would pile up the wooden dining room chairs on top of my bed and arrange the rugs over them to get draped forms. The ways the patterns changed and swooped when draped fascinated me. The rugs felt alive, dynamic.

Below is my second rug etching, this one of my rug.  I turned the form upside down to create a disoriented feeling of suspension and called it “Dragons and Fire in my Carpet.” Can you see the modification I made to the pattern?

second kilim etching

This third image is a drawing, rather than an etching.  Here I have all of the textiles together: my mother’s (right), mine (center), and the Swedish blanket returns (left).kilim drawing

The next is in colored pencil and graphite and was near the end of the series. This drawing is twice as big as the others, as you can see from the fact that it’s on two pieces of paper.

I left parts of the pattern as line-drawing without shading/color. I was trying to push the sense of distortion that is already part of the design, the edges of the diamond motif woven so they appear to ripple even before they are draped over a pile of chairs. You will notice that same sneaky modification to the pattern in this one. I remember now that those modifications felt like a gesture toward self-portraiture. By the time I finished this series I felt like the rugs protected me and mine hung on my wall for years as I moved from place to place. Only recently has it gone on the floor, in part of the bedroom where it is rarely stepped on, and only in bare feet.

color kilim drawing

This final image is the rug from which I am making the carpet bag. By draping it over a ladder, I’m evoking the series of drawings I made in high school but also revealing to you the infrastructure that creates the draped form. I would be inclined to call this something like: Portrait of a Turkish Carpet with Madurese Door and Step Ladder.

rug over the ladder.jpg

All of the items in this image have a social life that preceded my encounters with them. The step ladder is old and I’m not sure where it came from, someone in the family, maybe grandparents. And the carved wooden door was part of a house in Madura, an island off the eastern coast of Java in Indonesia. The windows are at home but the door is too tall to live in my house so it has to live at the studio.

The rug had a history before it ever came to me, as evidenced by damage and wear in the fibers, fading in the color. This means that part of the task of making it into a bag is stabilizing it, repairing it in ways that don’t cover up the evidence of its past lives, but instead preserve the detail of the damage. To me, what emerges in the patterns of wear and weakness is beautiful, the vestiges of social life somewhere else – living in another time and space.


Starting over after 25 Years . . .

My first job, at the age of 14, was in a little fabric store called L.T. Henry fabrics, which was owned by a man from New York who sent things down that he couldn’t sell in his main store in the garment district.  It was one of those stores that was tidy but packed with things, some of which had been there for a long time because they were so unusual.

I used to wander around the store, when there were no customers, hunting, finding new things, hiding the ones I like behind and under the other bolts.  The store had the conventional broadcloths, tweeds, double-knits, seersuckers, light suit wool, tulle, flannel (in the days before fleece), interfacing, bias tape, thread, zippers.  But there were also extraordinary silks, brocades, designer fabrics in a little fabric store in a shabby strip mall with a KMart and a People’s Drugstore.

I used published patters at first and then I started cutting my own patterns, winging it really.  I habitually skipped the pressing and the interfacing.  I always wanted to wear it the next day so I cut corners.  But over time I got better and eventually got a job in the costume shop at the Arena Stage repertory theater in Washington DC.  There, I learned couture and custom tailoring techniques.  I learned to measure the body to make slopers and how to manipulate a sloper to make flat patterns. I got really good.  Before I left the theater I made a beautiful custom tailored blue brocade silk jacket.  It still fits magnificently.  This is not a good picture.  I’ll take a better one.  It doesn’t convey how beautiful it is.  It took a long time – all those tiny, invisible stitches to marry the interfacing to the fabric on the underside of the lapel that I shaped over a ham to create a sensuous rounded fold.

And then I stopped. I went to graduate school. The independent fabric stores had already begun to close by then. I stopped for 25 years except for the odd, exquisite, custom-tailored Halloween costume (remember the beautiful, green, full-length coat in The Little Prince?) for my son when he was a little boy.

A few summers ago I took a class at the Haystack school of craft.  It was supposed to be about designing your Uniform.  I had long found that idea incredibly appealing and was so excited to go out and buy fabric for the Uniform I imagined – a series of long, fitted jackets and coats in wools and linens in a grey to black palette.  Fitted collarless blouses in linen, long skirts, flared pants.  The class was a disaster.  The instructor led us astray by starting with industry blanks instead of measurements to make our slopers.  The blanks, of course, didn’t fit anyone so they needed to be fit and made again.  No one had experience fitting so the students waited to be fitted by the instructor, moving the alterations onto paper, cutting muslins again, repeat.  The instructor had advised the students to add seam allowance to the pattern, rather than have the edges of the sloper pattern represent the stitching line, as I had learned in the theater (I ignored the instructor and my patterns edges represented the stitching line so I added my seam allowance every time, which was very slow).  If a student failed to add seam allowance to her pattern, the muslin wouldn’t fit.  Because there was so little seam allowance (students were advised the garment industry standard of 3/8″ rather than the custom tailoring standard of 1″, which allows for alterations on the muslin or the finished garment), the entire muslin would have to be made again after trying to figure out where the muslin had gone wrong.

And the problems go on like that.  I had to stop what I was trying to do for three days (the course was only 2 weeks!) to read a book on fitting so I could interpret correctly what the drag lines and drapes in the muslins meant and how to fix them.

Needless to say I never got to fabric.  I kept wishing I could remember everything I had known so well 25 years ago when I was at the theater.  I was so angry after the course that I didn’t continue to work on any of the projects I had set out for myself.

This week I’m starting again.  I’m going to cut two linen skirts, one short in grey, and one long in black.  I hope to wear the black one to my 10,000 Small Businesses graduation on August 2. I’m starting with a commercial patterns that I am tweaking. I will keep you posted!


The Secret Menu

I never knew Chinese restaurants have secret menus until a Chinese colleague took me to a restaurant that on the surface looked like all of the others I have ever been to.

sign for chinese restaurant
This menu of specials was outside of a Chinese restaurant next to the Korean grocery where I do my shopping, as it’s so much cheaper than the conventional grocery stores. The second item – Pork Intestines and Blood in Spicy Sauce – reminded me of two things:
1) A Chinese restaurant a Chinese friend took me to once in Champaign, IL when I was a post-doctoral fellow there. She said it was ‘pretty good.’ We were given the predictable huge menu full of the standard dishes. She handed that menu back and spoke to the waitress in Chinese and we were then brought a single sheet of white paper with about 8 things on it. My friend turned to me and explained that the chef is from Szechuan and this small menu was made up of authentic regional dishes, which were spicy and distinctive. She ordered for us, including several things that she explained were not on the menu but which were specialties of the area. The dishes were brought in courses. I have never had Chinese food like that Chinese food. I had never known there was a *secret* menu. The fact that pork intestine with blood and spicy sauce is on this menu tells me that the secret menu is on display. How exciting!
2) At Balinese ceremonies of a certain size, roasted pig is always on the menu. Every part of the animal is used. Communal meals are made in which a pyramid of rice is place on a square woven bamboo mat that is covered with banana leaves cut to size.  This mat is then put down on a wooden, table-like low platform on which a circle of guests sit in same-sex groups (never mixed). Around the rice are arrayed different parts of the pig, including a minimal amount of meat, and vegetables cooked in ways that you rarely see except at ceremonies because they contain ingredients like cubed pig fat mixed with steamed long beans cut in 1 inch segments, shredded fresh coconut, and a paste of turmeric, garlic, shrimp paste, and salt, and minced shallot, and chiffonade kaffir lime leaves. It’s the presence of the pork that makes them rare in other contexts as pig is ceremony food.
After everyone is seated and the food has been placed in the center of the group, one of the women takes her fist and punches a well in the rice. Then a bowl of spicy warm pig blood is poured in the well. Everyone eats together with their hands from this common platter, taking rice and small amounts of meat and vegetables onto the tips of the middle three fingers of the right hand. Once you are ready to put the food in your mouth, you push it off with your thumb while sticking out your tongue just enough to catch the food and at the same time ensure that your mouth and hand do not make contact. Using this technique, there is no ‘double dipping’ even though everyone is using her hand.
It’s the specific technique for eating with your hand that is is key, not just at ceremonies but always. No licking fingers. Food doesn’t go in your palm. It’s a bit tricky at first if you have never done it before (and people will laugh at you for your inept initial attempts) but you get used to it.
This ceremony food always made me mildly sick for a week, gurgling stomach, vague malaise. I finally gave up on it and said I wasn’t allowed to eat pork. Then I was relocated to a pavilion with the priest and other ritual specialists who also are not allowed, for religious reasons of purity, to eat pork. So we ate duck and never from a common bowl. No stomach problems ever again.
Though I appreciate the secret Chinese menu coming out of the closet, I will not be trying the special! Not because I’m not brave enough or find it disgusting. Indeed, I’m confident it’s tasty. But experience has made me wary of this dish.

A Past Life in Bali

We all have our past lives.  I used to have a dream – which I haven’t had in a long time – in which I was walking through the rooms of a magnificent house, room after room, each leading to the next.  They went on and on.  They didn’t repeat.  I think about the episodes of my life like this – like a series of rooms.  I entered the room. I was in the room for awhile. And then I left the room. My PhD fieldwork in Bali, Indonesia between 1998 and 2000 was one of those rooms.

I left the United States when my son was just one and a half.  I had funding from three different academic institutions: Fulbright, Wenner-Gren (specifically for Anthropology), and the Asian Cultural Council.  Between the three grants, I had enough money to conduct research in Bali for two years.

My Bali is a difficult place, full of magic, envy, meanness, sickness, inter-village warfare, marriage by rape and abduction, poverty.  And it’s also beautiful. It is undeniably a physically beautiful place with exquisite rice terraces, spectacular ceremonies, gorgeous people, astonishing music and dance.

But none of this is the most beautiful part of Bali to me. What is most beautiful is the unseen meanings behind ceremonies, offerings, dance, poetry, stories, music.  The ways in which people put into practice and embody a cosmology that articulates a relationship between the universe and the human body – those are the aspects that, to me, are breathtaking.

I studied those things in various ways, through an investigation of dance, in which the dance movements and postures are gendered – male, female, ambiguous.  I studied Balinese life crisis rituals: tooth-filing, marriage, mortuary, birthdays for people and temples, and calendrical ceremonies in which the gods are ritually bathed and entertained.  I studied Balinese esoteric texts written in Old Javanese, a Sanskrit-based language used for religious and ritual books and incantations during ceremonies.

The works I studied ranged from anatomies, which began with the glance of lovers eyes (wonderful, no?), love magic, meditation maps, ethnobotanical treatises on the characteristics of plants and plant parts, instructions for how to die, and erotic instruction manuals similar to the Kama Sutra.  I learned how to cook.

I learned how to dress appropriately, how to move differently, how to bargain in the market, and what not to do.  And I lived in a village and learned how to be a person by hanging out with other women, listening to their gossip, watching them work, absorbing their lessons for me.

A big part of learning how to be a person was watching how my neighbors taught my son to be Balinese and how I came to understand their cultural instructions. I will share them with you and if you are a parent, you will find some of it very useful.

Below is a picture of my son when he was 3 and we were on a vacation from Bali to Borobudur in Java. – 1999

What an amazing place it was to raise him for some of those first critical years.  It’s true that it takes a village.  We were lucky to have one for awhile.

This Course Changed My Life & How I Think About My Business

I want to tell you some news that I am so proud of. I just finished a business course called 10,000 Small Businesses. It’s run by the Goldman Sachs Foundation and has support from Bloomberg Philanthropies.

The curriculum was developed by Babson College which has one of the most respected MBA programs in the country. Warren Buffet is on their Board. In fact, at our graduation on August 2, Warren Buffet will be present, along with: Catherine Pugh, the Mayor of Baltimore: Lloyd Blankfein, the CEO of Goldman-Sachs; Michael Bloomberg; and a representative of the Harvard Business School. Are you getting the message yet? It’s a big deal. And: It’s free!

I found out about it by chance. I am on an email list for Baltimore small manufacturing businesses and get updates about courses and opportunities and this was one of them. I actually didn’t know what it was. I imagined it was a weekend workshop and figured I would just apply, clicked the link, wrote the essays, and then didn’t think much more about it. Little did I know.

You have to make at least $100,000 gross, have 2 employees, and they are especially interested in businesses that are minority and women owned. Getting in is competitive. You write essays, submit your financials, write more essays, have an interview, and then hope.

The course has 9 modules and runs over five months. We didn’t have class every week, but usually had two back-to-back in one week from 8am – 5:30pm. (Breakfast, lunch, and snacks in the afternoon were catered and were healthy and delicious with salads, whole grains, vegetables, several protein options, fruit, and dessert. As you can see from the list, vegetarian options were available at every meal and all of you paleos would have been just fine too.)

We covered money, marketing, personnel, leadership skills, negotiation skills, bankability, funding, operations. And unlike many business courses that focus on developing a business plan, this course focuses on what they call a Growth Plan. You have to develop a new opportunity and come up with a feasible and actionable plan for engaging that new opportunity in order to grow your business.

10,000 Small Businesses emphasizes that if you are doing what you have always done you are shrinking, you are dying, slowly going out of business. All businesses have to keep innovating in order to grow and in order to do that you can’t do it part-way. You have to be all in.

This course talked about the difference between a good idea and a growth plan, research-based decision making versus emotions-based decision making, business decisions based on the financials, not gut feelings.

I didn’t know what inventory turnover rates were. I didn’t know what break-even points were. I didn’t know how to figure out my shop rate. How do you know what is cost of goods sold versus overhead? Now, those of you with business backgrounds may judge me. Please don’t. I ended up doing this business by accident. I never planned to be here.

I have learned on the hoof. I was trained as an anthropologist. I’m a designer. I never had any training in accounting or business and have berated myself over the years for being a bad business woman until I decided I didn’t have to take up brain space daily by castigating myself for not being up to date on the books. I decided I could do better. Now my books are up to date (and they need to be if you are going to apply for 10,000 small businesses because it’s part of the application). Despite winging it, I have been able to make a living and support myself as a single mother with sole responsibility for my son – no child support ever. I have a house. I have a beautiful studio space. I have 2 full-time people in Indonesia who the business supports. I work with many artisans there, Fair Trade, and they rely on the business we do together to support their families. I have a half-time person here in the United States.

I have survived. But survival is always only just enough. And right now it’s not quite enough.

So I have developed my growth plan – which is to create a line of ‘affordable luxury, branded silver jewelry for a broad customer base that extends beyond the niche market of home knitters and needleworkers I currently serve.  I have begun to implement it, as you can see from my last blog post, and for the first time I can see past survival. I can imagine JUL as a bigger design company (and they say being able to visualize it is the first step). We did visualization exercises in class it’s so important! And I now have the tools to make that vision a reality. I have to admit I’m scared right now. But I’m also excited and exhilarated.  The new design work I’m doing with Agus (in the picture below) is what I really love about what I do.  And as we go along in this new direction, I will add more categories of designs – housewares, wearables, and bags again once it’s financially feasible and I have the right infrastructure to make you beautiful bags at an affordable price without losing my shirt.

I am so thrilled to be entering this new phase!  And I’m so excited I can share it with you through the new designs we are working on!

Below you can see me with my creative partner in Bali, Indonesia.  His name is Agus.  I have worked with him for 10 years as my co-designer and collaborator.  Since Agus’ father died suddenly of a massive heart attack a year ago, he has been the head of the family, responsible for taking care of everyone and for most of the income that supports the household.  His wife assists him with his work on JUL by sharing management of production and overseeing quality control and book keeping.

My First Product . . .

I started my business with just one thing.

Really I started with nothing.  Nothing and my collaborator in Bali – Agus – my creative partner now for almost 10 years.  Agus was given to me by my friend Wayan.  This is how things work in Bali. You get relationships through other relationships.  Connections are gifted.

I met Wayan when my son was just starting to walk.  Julian must have been just over a year (he started walking at 9 months).  Now he’s 20, about to go to college in a month and half (I can hardly absorb that, and I’m not at all a clingy mom – I just thought about how a German friend used to pronounce that word: with the ‘g’ soft like the French for ‘I’ – Je, or as in the word ‘fringy’).

Wayan and I were sitting in a waiting room at the Johns Hopkins tropical medicine clinic or something like that.  We were there to get exotic vaccines before going to Bali – cholera, other things, don’t remember.  I kept looking at him thinking – he looks Balinese, or maybe from the Philippines. But I thought Bali.  And I also thought, how unlikely; probably I’m wrong.  This is a picture of Wayan in 2006.

Julian walked to him, put his hands on Wayan’s knees and looked up at him.  Wayan was lovely with Julian until Julian did something inappropriate, though I don’t remember what.  And Wayan (whose name I didn’t know yet), said “I don’t like that,” and I felt terrible about my boy’s faux pas.  Though I shouldn’t have.  It’s the job of adults, all adults I believe, to elder children.  If we are community, then we all have a responsibility to discipline and praise children when they behave according to conventions of polite behavior, or violate them.  But I didn’t have that view yet.  I felt like it was my fault that Julian had done something to which Wayan objected.  Yet Julian was just a baby.  He wasn’t fully a person.  He had a long way to go. Wayan was not judging me.  He was eldering Julian, Balinese style.

I don’t know how it happened but Wayan and I started talking. I learned he was indeed Balinese. He learned I was going there to do PhD research. We knew someone in common (how likely is that?!). We exchanged contact details. Wayan turned out to be a dancer. I was going to study gender and dance. And that’s how it started.  I won’t tell you all of the story now.  You must be patient. It will unfold.  It’s a good story.  It crosses centuries.  It takes awhile to tell.

For now I will offer the abbreviated version.  Wayan and I became friends in Bali.  We both returned to the States. We continued our friendship. Then we both returned to Bali . . . So when I was in Bali once years after that, still in academia doing research on marriage by capture, which I will tell you about a bit later, my sister, Noni, asked me if I could find someone who could make some hardware for bags. Everything she had found available in the US was boring she said.  Couldn’t I help her get something more unique, something better, to go along with the knitted/felted bag patterns she had begun doing?  I said of course.

So I asked Wayan if he knew anyone.  And he did.  He brought me Agus.  Agus had long dreadlocks then.  I don’t know whether they were really his hair nor not.  But it was the affectation of an artistic person to have unusual features like that – dyed hair, dreadlocks, gauged ears (even though traditionally, that was a Balinese thing for both men and women and old men and women always had huge ear-holes). Agus was quiet.  Wayan did all the talking.

Agus and my son Julian in 2011. I met Agus in 2006 but I can’t seem to find any photographs of him at all from that time.

Wayan and I always speak in English. He is the only Balinese person I speak to in English.  When he speaks in English, he understands me. He has absorbed alot of American-ness, so he is flexible and open, values so many things about the way we do things differently, as long as he is speaking in English. When he speaks in Indonesian, he is not as tolerant of my American idiosyncracies. And in Balinese, even less.

So when I met Agus, Wayan posed as a translator I didn’t need, mediating my interaction, as if Agus and I couldn’t make contact without him.  And maybe we couldn’t initially, though not because there was a language barrier.  There was none. The barrier was we didn’t have a relationship.  We had no shared history.  We had no social context that made working together make sense.  That had to be built.  And it was slow.

Indo July 2011 070
Agus and my son Julian in 2011. I met Agus in 2006 but I can’t seem to find any photographs of him at all from that time.

In Bali, when someone employs another person, the employer is the tree.  The employee is the fruit – anak buah, or fruit person/child.  This is, as you might guess, an hierarchical relationship.  The tree determines what happens.  The tree makes all of the decisions.  The anak buah  is the follower.  The anak buah does as s(he) is told.  No decisions come from the anak buah.

But this model of the tree and the fruit did not work for me.  I needed someone who could make decisions in my stead, act as an agent, be my collaborator, my fellow ‘tree,’ not my fruit.

Agus would tell me – I’m embarrassed to go pick up our castings because we haven’t paid the workshop.  I would ask – why haven’t you paid them?  He would say that I hadn’t told him to pay them.  I would protest that I hadn’t even known they needed to be paid.  I instructed that if someone needed to be paid in order for us to complete the products our customers wanted, then he was authorized to make decisions about who should be paid and how much.  All he had to do was let me know.

It took a long time to get to the point where he felt comfortable making executive decisions; I needed to be able to rely on him completely while I was here in the US and he was there in Indonesia.

At the beginning, he was someone I didn’t know.  But he knew how to design jewelry. And through Wayan, however unnecessary his translation/mediation was at the time, we negotiated that Agus would do some designs for me.

Agus came back with a lot. This is the one I used.  This is the first design.

The first ones were all handmade.  They were sterling silver.

They took too long to produce and were too expensive.

This is how JUL started:

Just a Little Tease . . .

We are working on an amazing, new, full collection of silver jewelry that we know you will love!

We decided to tell you about it now because, honestly, we are so excited we couldn’t wait to let you in on our secret. Some of your favorite yarn shops have already expressed in carrying the line and once the first collection is ready, we will announce a list of shops where you will be able to go see it in person. And, of course, it will be available on our website as soon as it comes in.

I am not just a designer.  I am an anthropologist.  I did my research on contemporary culture in Bali, Indonesia.  I lived there for a total of 3 years.  I speak the language.  I understand the culture.

My full-time creative collaborator, Agus (pronouned Ah-goose), is Balinese.  I have been working with him for 10 years.  He was trained as a jewelry designer and he is an integral part of the design process that brings to you the shawl pins and shawl sticks you have come to love and wear with your gorgeous handmade knits, crochet, and weaving.  He and I work together by video-chat to develop and tweak designs that have a relationship to culture, history, art, and architecture.  Each one of our designs has this kind of foundation in meaning and my lived experiences in Bali, traveling to other places, and conducting research about other life-ways and cross-cultural modes of thinking.

Up to this point I haven’t shared these stories with you.  And for that I apologize.  Because it makes a difference when you know the story.  I can offer to you not only a beautiful object, but the beautiful, sometimes funny, sometimes sad stories behind those objects.  I can share with you my memories and in this way they can become your memories, embedded in the object, something you can carry with you every time you wear something from JUL.

Our first full collection of silver jewelry – which will consist of 11-13 bracelets, necklaces, pendants, and earrings – will be available in time for your Christmas shopping in late September or early October.  We are making our prototypes right now.  Once we know they are all exactly as we want them, we will go into production and will definitely keep you posted as the collection comes along.  We already have a few of the pieces and decided to tease you just a little so you can share in our excitement!